Meta description: Learn in detail how to use gimbals and filming techniques to reduce camera shake when shooting with a smartphone or camera, allowing even beginners to capture smooth footage.
Want to improve the quality of the video you take with your smartphone or camera? Using a gimbal reduces camera shake and allows you to shoot stable, smooth, high-quality footage. However, many people don't know how to use it and end up not being able to use it properly, even after purchasing one.
This article is aimed at people who have already purchased a gimbal but are not yet able to make use of it, as well as people who are planning to purchase one, and will introduce how to use a gimbal, from basic operations to advanced techniques.

What is a gimbal? Basics you need to know before using it
A gimbal is a piece of filming equipment that physically stabilizes smartphones, cameras, and other filming devices. It is widely used by amateurs and professionals alike as a tool to prevent camera shake and capture smooth footage, and in recent years has been used in YouTube videos, vlogs, and other personal productions.
Benefits of using a gimbal
The biggest advantage of using a gimbal is that it minimizes the shake that occurs when shooting handheld. This allows you to shoot while walking, resulting in smooth footage that is easy to watch and comfortable to watch when played back.
Furthermore, because they can capture stable footage regardless of the photographer's level of expertise, even beginners can produce high-quality footage. For those who want to stand out through the quality of their footage, gimbals are an excellent piece of filming equipment.
Types and features of gimbals (for smartphones, cameras, and drones)
There are many different types of gimbals available depending on the application.
-
Smartphone gimbal: Lightweight and easy to carry, ideal for vlogging and everyday recording.
-
Camera Gimbal: Compatible with professional cameras such as SLRs and mirrorless cameras, allowing for stable shooting even with heavy equipment
-
Drone gimbal: Designed to reduce shaking during aerial photography, it enables stable shooting even with drones that are susceptible to vibrations and wind during flight.
By choosing the right gimbal for your purpose and shooting style, you will be able to capture more satisfying footage.
Basic gimbal operation
Gimbals have a variety of functions, but even beginners can use them quickly once they understand how to use them. This chapter explains the process from setup to starting shooting for first-time gimbal users.
Preparation before turning on the power (balancing and installation)
The first thing you should do is to mount and balance your equipment. If you don't, the gimbal motors will be overloaded and won't perform as well as they should. Don't forget to pair your DJI gimbal with the app.
After mounting the camera, adjust the tilt, roll, and pan axes to keep it level and vertical. Some smartphone gimbals have an automatic balancing function.
Power on and mode switching
Once the balance adjustment is complete, turn on the power and select the shooting mode.
Pan Follow (PF) mode: Follows only the horizontal movement of the pan axis, while the vertical tilt axis and rotational roll axis are fixed, allowing for smooth horizontal movement.
Lock mode: The pan and tilt axes are fixed, so the composition remains the same even when the gimbal is moved.
- FPV mode: Tracks all gimbal movements, allowing for free and dynamic shooting
Basic grip and stance
How you hold the gimbal also plays a big role in the stability of your footage. While holding it with one hand is easy, it can become tiring over long shoots, so it's best to support it with both hands. Using the optional briefcase handle also allows for stable footage, even at low angles.
How to use and shooting modes for different scenes
The true value of a gimbal is revealed by using it appropriately for the shooting scene. In this chapter, we will introduce how to use it and the shooting modes for each shooting scene, such as vlogging, travel, sports, and aerial photography.
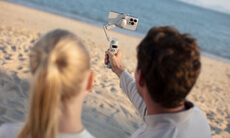
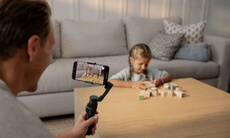
Vlogs and travel photography
PF mode is ideal for capturing landscapes, food, and selfies while traveling. In PF mode, only the pan axis tracks, resulting in footage with natural horizontal movement. Additionally, if you're using a smartphone gimbal like the DJI Osmo Mobile 8 or DJI Osmo Mobile 7 series, the lightweight design makes it easy to shoot with one hand.
Sports and fast-moving subjects
For scenes with fast-moving subjects, we recommend using Sport mode. For example, the DJI Ronin-SC's Sport mode can track fast-moving subjects, directly conveying a sense of speed and power in the footage.
How to use drones and aerial photography
Camera drones like the DJI Mavic 4 Pro and DJI Mini 4 Pro are equipped with gimbals, allowing for stable footage even at long distances. Some drones also feature 360° rotation, allowing for smooth, dynamic aerial shots.
Common mistakes beginners make and how to fix them
While gimbals are convenient, using them incorrectly can ruin your footage. In this chapter, we'll explain common mistakes beginners make and how to avoid them.
Balance adjustment: If the balance is not adjusted, power consumption will increase, battery life will be shortened, and stable video recording will not be possible. Make sure to balance the camera beforehand. The DJI Ronin series makes it easy to set up and balance using the app.
・Battery running out: Running out of battery while shooting is something you want to avoid. Make sure to check the battery life of your device beforehand and fully charge it before use. Also, if your device has a replaceable battery, it's a good idea to purchase a spare battery.
・Incorrect mode selection: If the captured image does not match the intended movement, try reconsidering the mode selection. It is a good idea to take a test shot before shooting.
How to use DJI gimbals
DJI offers a wide range of gimbals. In this chapter, we will introduce the features and usage of each, using the DJI Osmo Mobile 7P for smartphones and the DJI RS 4 Mini for cameras and smartphones as examples.
DJI Osmo Mobile 8 Setup and Recommended Features
The Osmo Mobile 8 is a versatile smartphone gimbal featuring seamless 360° pan rotation. Once you snap your phone into the magnetic clamp, you can utilize Apple DockKit for instant NFC pairing, allowing you to start tracking immediately without opening an app.
Recommended features include the "Multifunctional Module" for native tracking with integrated audio and lighting, a built-in extension rod for wider angles, and a 10-hour battery life that supports phone charging, making it an all-day creative companion.
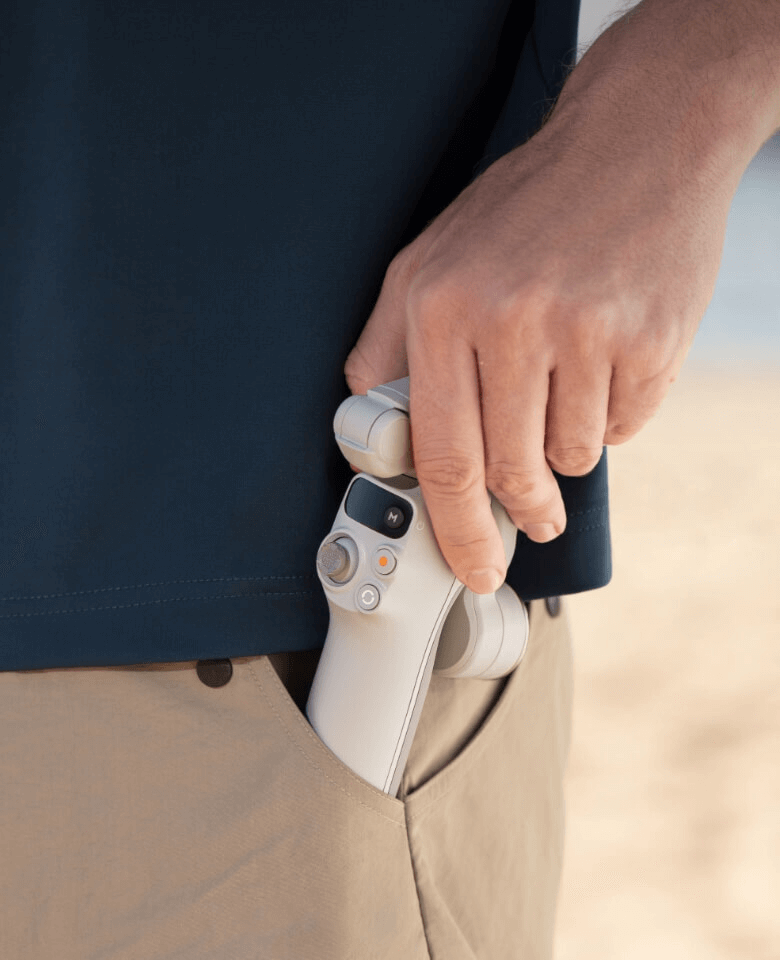
DJI Osmo Mobile 7P Setup and Recommended Features
Caption: How to use Osmo Mobile 7P
DJI The Osmo Mobile 7P is a lightweight, portable smartphone gimbal. Once you pair your smartphone with the gimbal, you can simply attach your smartphone to the gimbal and launch the DJI Mimo app. You can start shooting immediately and enjoy a variety of other features.
Recommended features include "ActiveTrack 7.0" which automatically tracks the subject, gesture shooting, and the ability to switch between normal shooting and selfies by simply pressing the trigger three times, making this the perfect device for vlogging.
DJI RS 5 Setup and Recommended Features
The DJI RS 5 is a lightweight commercial gimbal with a 3kg payload capacity. Once powered on, the 2nd-Gen Automated Axis Locks instantly unlock the gimbal, meaning you can go from storage to shooting in seconds.
In addition to the 5th-Gen RS stabilization algorithm, recommended features include the "Enhanced Intelligent Tracking" which lets you frame subjects like vehicles or pets directly via the touchscreen, and the new Electronic Briefcase Handle for effortless low-angle control.
DJI RS 4 Mini Setup and Recommended Features
The DJI RS 4 Mini is a lightweight, highly rigid professional gimbal that supports cameras and smartphones weighing up to 2kg. Once paired with your device, you can start and stop recording with the buttons on the gimbal itself.
In addition to professional image stabilization performance with the 4th generation RS stabilization algorithm, it is packed with features that expand the range of visual expression, such as the ability to track a subject in one second with just one press of the trigger.
FAQ
We will answer frequently asked questions about gimbals.
What is the difference between a gimbal and a stabilizer?
Gimbals use motors and sensors to reduce camera shake, while stabilizers use weights to reduce camera shake, and some models don't require batteries.
Since the balance is adjusted manually, it is difficult to control and has low precision.
Are there any tips for beginners using gimbals?
First, carefully read the manual and get familiar with basic balance adjustments and mode switching. It is also effective to take test shots before shooting to check the composition and movement.
How do I choose a gimbal for my smartphone or camera?
A smartphone gimbal is sufficient for everyday use and vlogging, but if you are going to be doing serious photography or using heavy lenses, it is generally better to choose a camera gimbal.
Summary | Master the use of gimbals to improve the quality of your footage
By using a gimbal, anyone can easily dramatically improve the quality of their footage. By mastering the basics and selecting the mode that best suits the shooting scene, you can dramatically improve the quality of your work.
To produce professional-level smooth footage, be sure to experience the charm of a gimbal.